
I’ve been wanting to try to make croissants for a while, and since I got a marble pastry board and rolling pin for Christmas, I decided to try it again. I had tried once before, but that was a complete disaster. During the rolling and folding stage, the dough must be kept cold or else the butter will melt and you won’t get the layers that a good croissant has. The best tool for this is marble because it stays cooler longer, which is a big plus when it comes to making these. I tried once just rolling them out on my countertop and it just got warm and sticky too quick, making it unusable. And since marble countertops are super expensive, I thought a marble pastry board would be the next best thing.This is a simplified version of a traditional croissant from my favorite baking blog Bigger Bolder Baking. Now onto the recipe!
Here’s the recipe I used if you want to try it out: Homemade Croissants
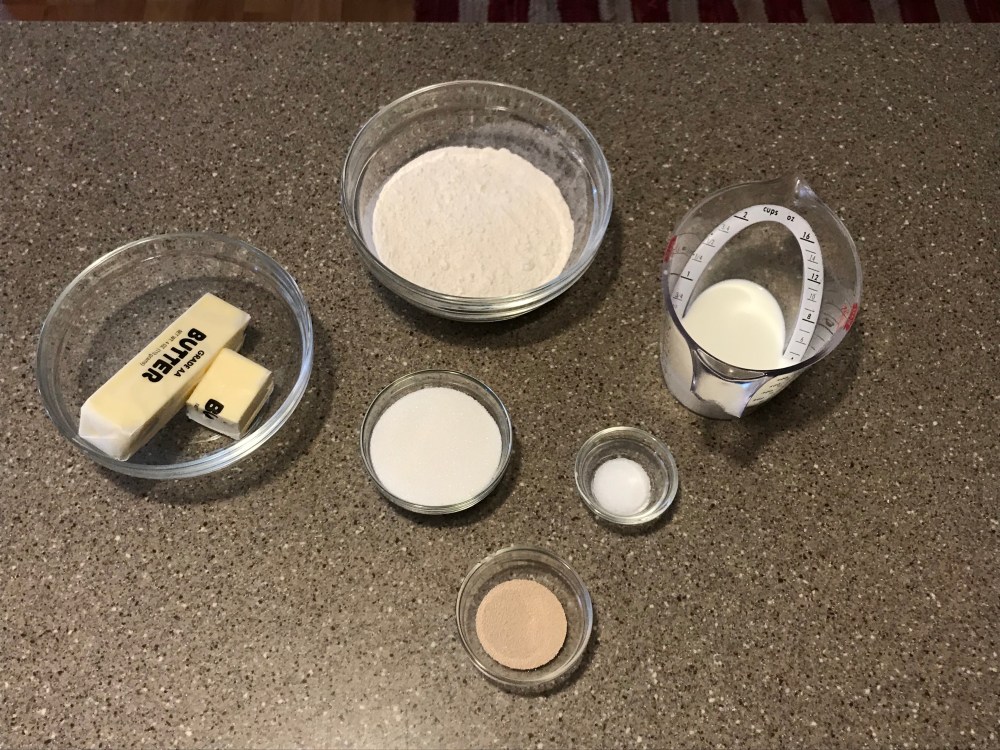
Ingredients
- 1/2 cup warm milk
- 1 3/4 cup bread flour
- 1/2 tsp salt
- 11 tbsp (1 stick plus 3 tbsp) butter, frozen*
- 4 tbsp sugar
- 2 tsp yeast
- 1 egg yolk plus 1 tbsp milk, to promote browning
*This will make adding it to the dough much easier and it won’t get soft as quickly as refrigerated butter.
** This is a 2 day process that requires a lot of time and patience.
Start by warming your milk in the microwave until it reaches 90 degrees on an instant read thermometer, if you go any hotter than this, the yeast won’t be able to do its thing and help the dough rise. Set this aside for now, then in a large bowl whisk together the yeast, flour, sugar, and salt.
Take your butter out of the freezer and using the large holes on the grater, grate your butter into the dough.
Slowly add in the warm milk and mix with a spatula or wooden spoon until everything is just combined. Don’t overmix, you want the butter to remain in pea sized pieces. Resist the urge to add liquid, the dough will look dry now but it’ll work out in the end.
Dump the dough out onto a lightly floured surface. I’m using my new marble pastry board. Press the dough into a square, and wrap in plastic wrap. The dough will be soft at this point, so don’t worry. Put it in the fridge for 1 1/2 hours. I left mine in the freezer for an hour so it could firm up a little more, because when I took it out of the fridge, the dough was still really soft. It worked better putting it in the freezer because while the middle slightly froze the edges set just enough for it to not be completely soft.
Now it’s time to create the signature layers that a croissant has through a process called lamination. This would normally involve rolling out the dough, putting a sheet of butter in the middle and repeatedly folding it into thirds while keeping the butter cold so that it doesn’t get too soft and melt into the dough. With this recipe however, there’s just the folding process since the butter was grated into the dough earlier on.
Dust your work surface and rolling-pin with flour, then roll the dough out into a rectangle roughly 14 1/2 x 10 inches, fold the short sides into the middle and turn the dough a quarter turn, rolling it out a little to lengthen it, then continue this process 2 more times.
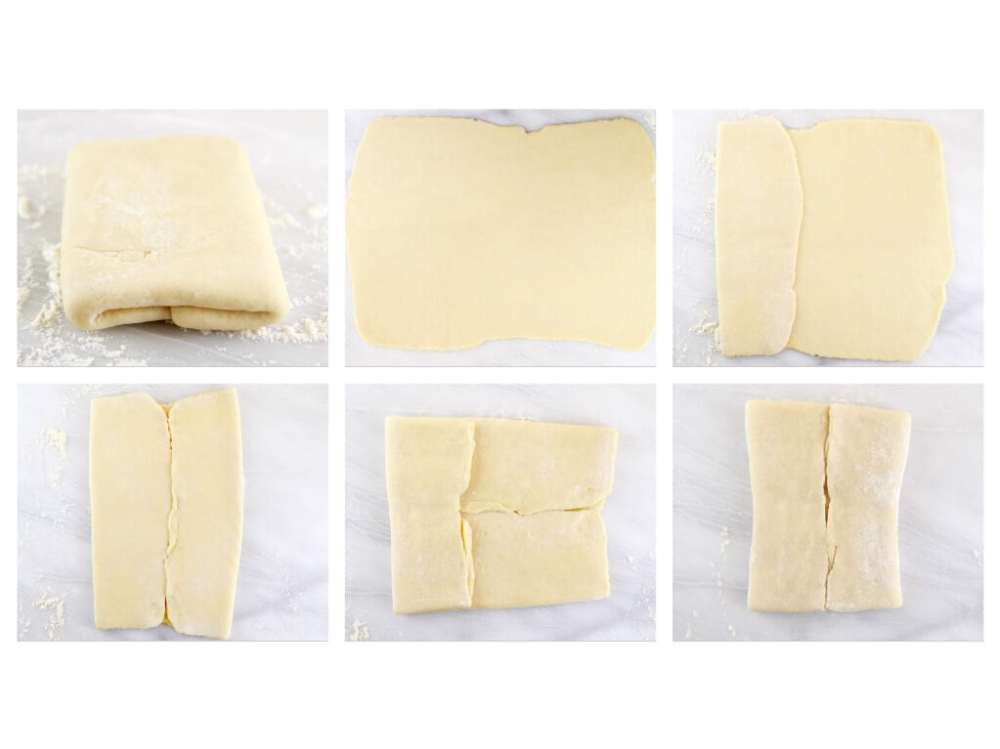
Here’s a little diagram from the Bigger Bolder Baking website to go with my description. If you’re anything like me, then having a visual aid while baking is a lot easier than just reading the directions. Once your dough is all folded and rolled it’s time to wrap it in plastic wrap and refrigerate over night so that the gluten has time to relax and the layers can fuse together a little bit.

The next day, (just a side note, I didn’t take any pictures of the cutting and shaping of the croissants because I was so focused on keeping the butter cold and shaping them properly), prep your work surface and rolling-pin with flour and roll out the dough into a 21 x 8 inch rectangle. Using a bench scraper cut diagonal lines in the dough resulting in triangles that are wider at the top and skinny at the point. Make a small slit at the top of each triangle and stretch them apart slightly, then begin to roll each of them up making sure that the point is on the bottom of the croissant so that they don’t come undone during the proofing and baking.
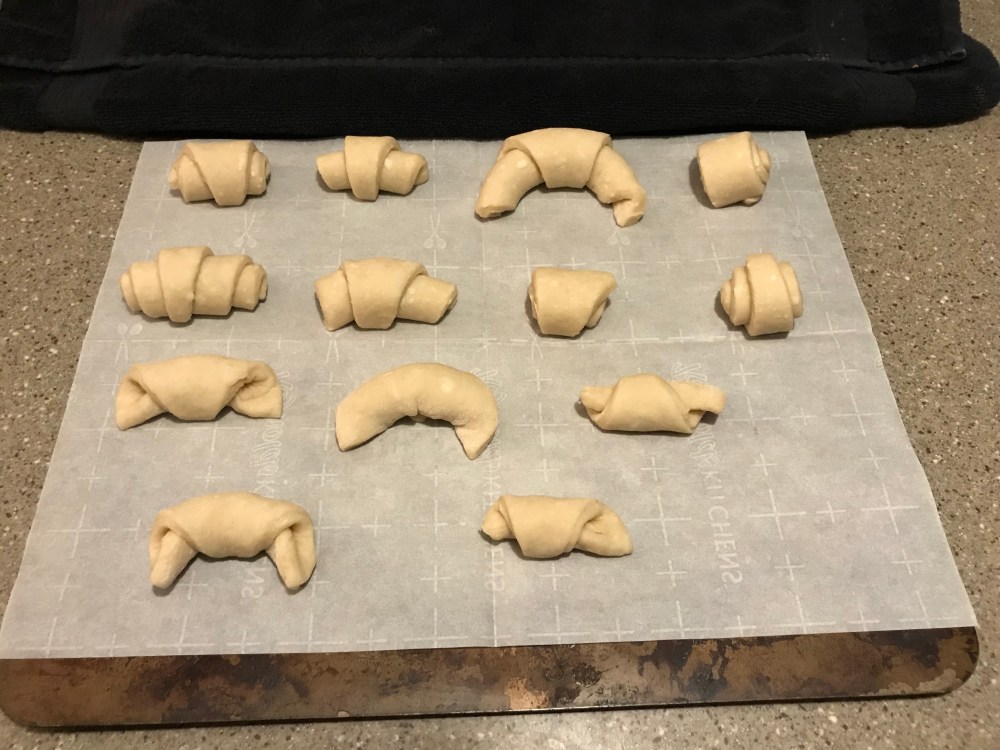
Once all of the croissants are cut and shaped let them sit at room temperature for 2-3 hours for their final rise. There’s no shortcut here, this gives the yeast time to do their thing and lets the dough come to room temperature.
Once the croissants have risen, preheat your oven to 400 degrees F, then lightly brush each one with eggwash (1 egg and 1 tbsp milk lightly beaten together) then bake them for 10 minutes. Then reduce the heat to 375 degrees F and bake until they’re golden brown, about 5 minutes longer.
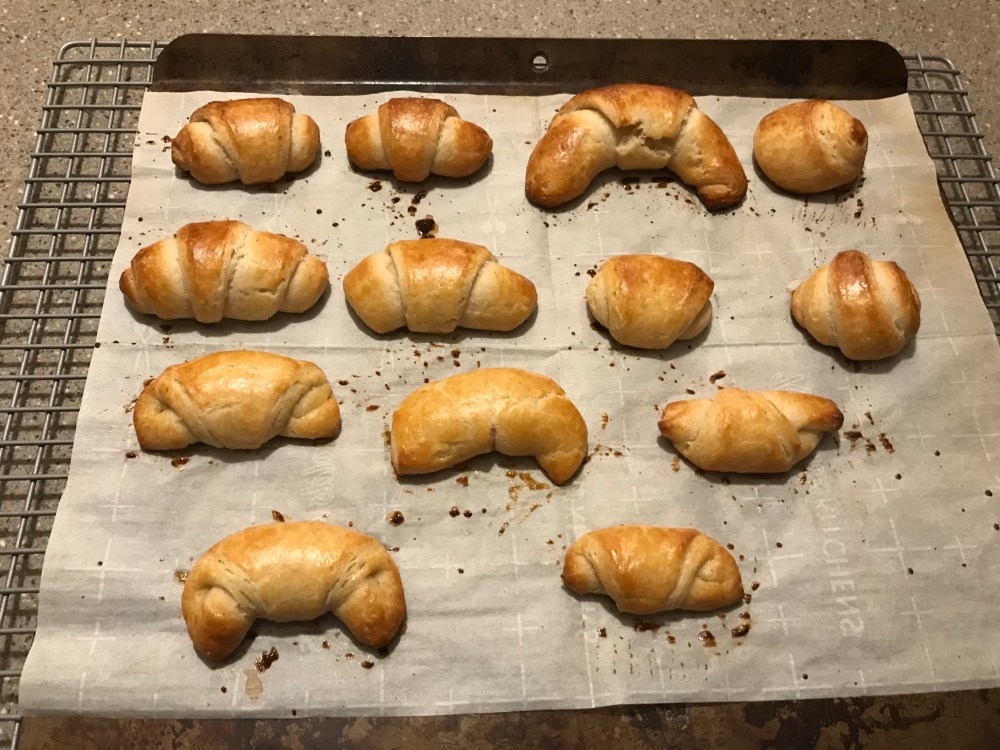
As you can see mine are a little misshapen and not as brown and crinkly on the top like a croissant usually is. There were no flaky layers. It was more of a cresent roll than a croissant, but it was quite tasty. So I’m going to keep trying. Stay tuned for attempt #2 where I’ll be trying a more traditional recipe and technique.
As always if you try this one or any recipe on here, please leave a picture in the comments and tell me how you did. I’d love to see it and hear how it went.
Until next time,
Peace, Love, and Sugar,
Brooke

