
Time for something a little creepier for my next Halloween post, a brownie bite graveyard! This was a lot of fun to decorate, because I got to add a little bit of creepy Halloween feel to this one. While trying to figure out how to decorate these to look like graves, I realized just how many Halloween decorations and sprinkles I really have. You’ll see that stuff later in this post. I got this idea because I haven’t seen any cool Halloween themed brownie recipes, just lots of cake. Don’t get me wrong, I love cake as much as the next person but brownies are just as good and sometimes, I really want a delicious, fudgy brownie over a slice of cake. They also make the perfect base for a graveyard set up, the chocolatey brown color is perfect for this one. Now that you’ve heard my inspiration on to the recipe!
The recipe I used for this one is from a magazine that I used to get, Rachael Ray Everyday. This recipe makes such awesome, fudgy brownies, which I love.
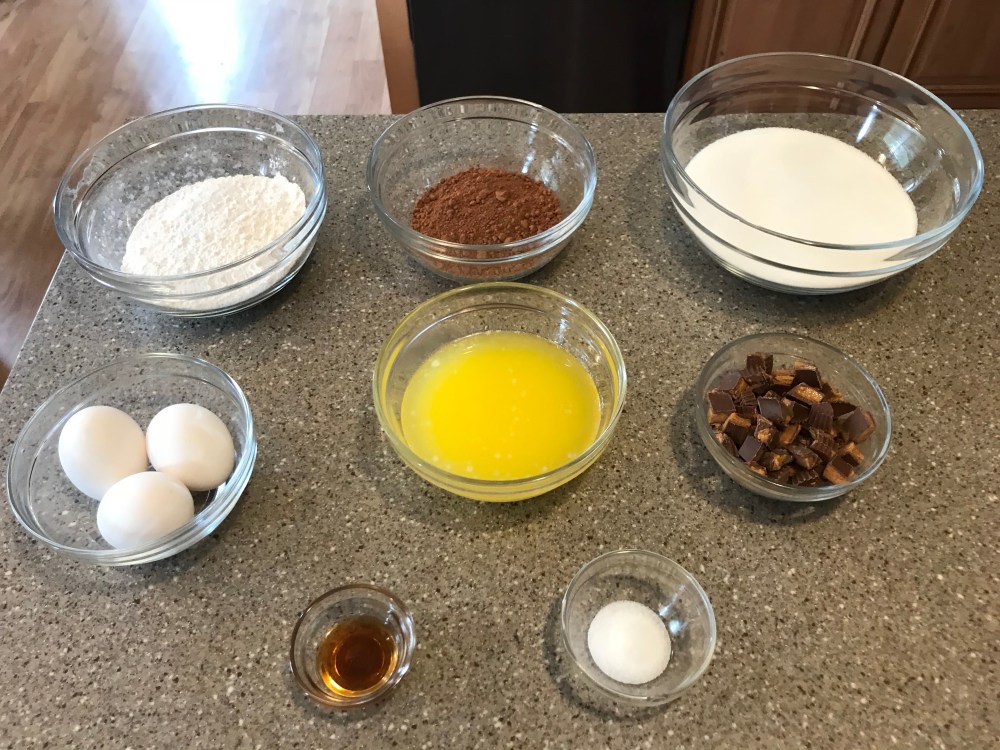
Ingredients:
- 2 cups sugar
- 1 1/2 sticks butter, melted
- 1/2 tsp salt
- 3 eggs
- 1 cup cocoa powder
- 1 cup all-purpose flour
- 9 snack size peanut butter cups, chopped up
- 1 tsp vanilla
Ok, so the peanut butter cups and vanilla weren’t in the recipe, those were my own little modifications. Chocolate and peanut butter go amazing together and I love the taste that vanilla gives to the brownie batter.
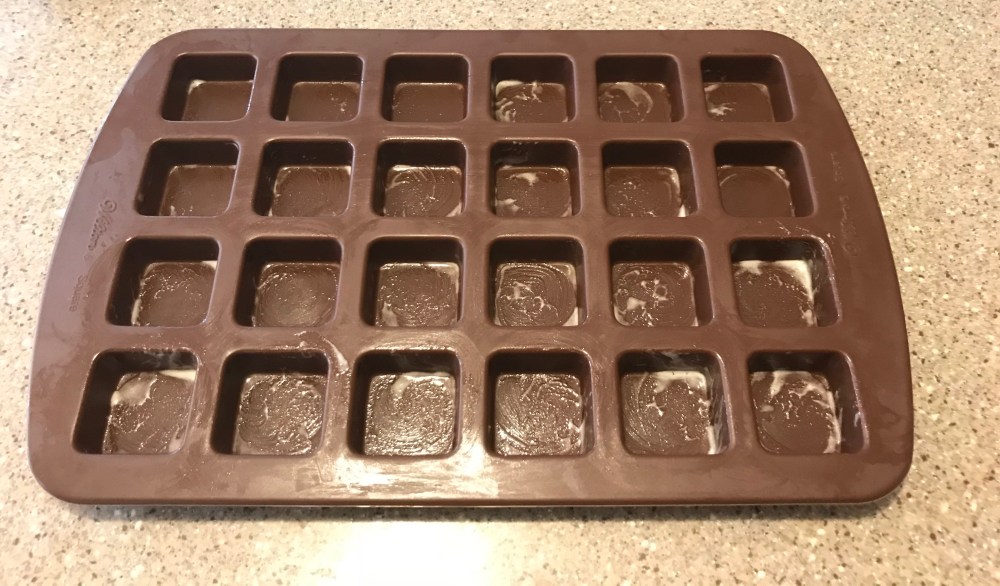
Preheat your oven to 350 degrees and liberally grease your brownie pan of choice. I chose to use a little bite size mold that I have to make nice, evenly sized brownie bites. If you want to bake a pan of brownies and cut out the little squares yourself, go for it. I didn’t do that because mine wouldn’t be even squares.
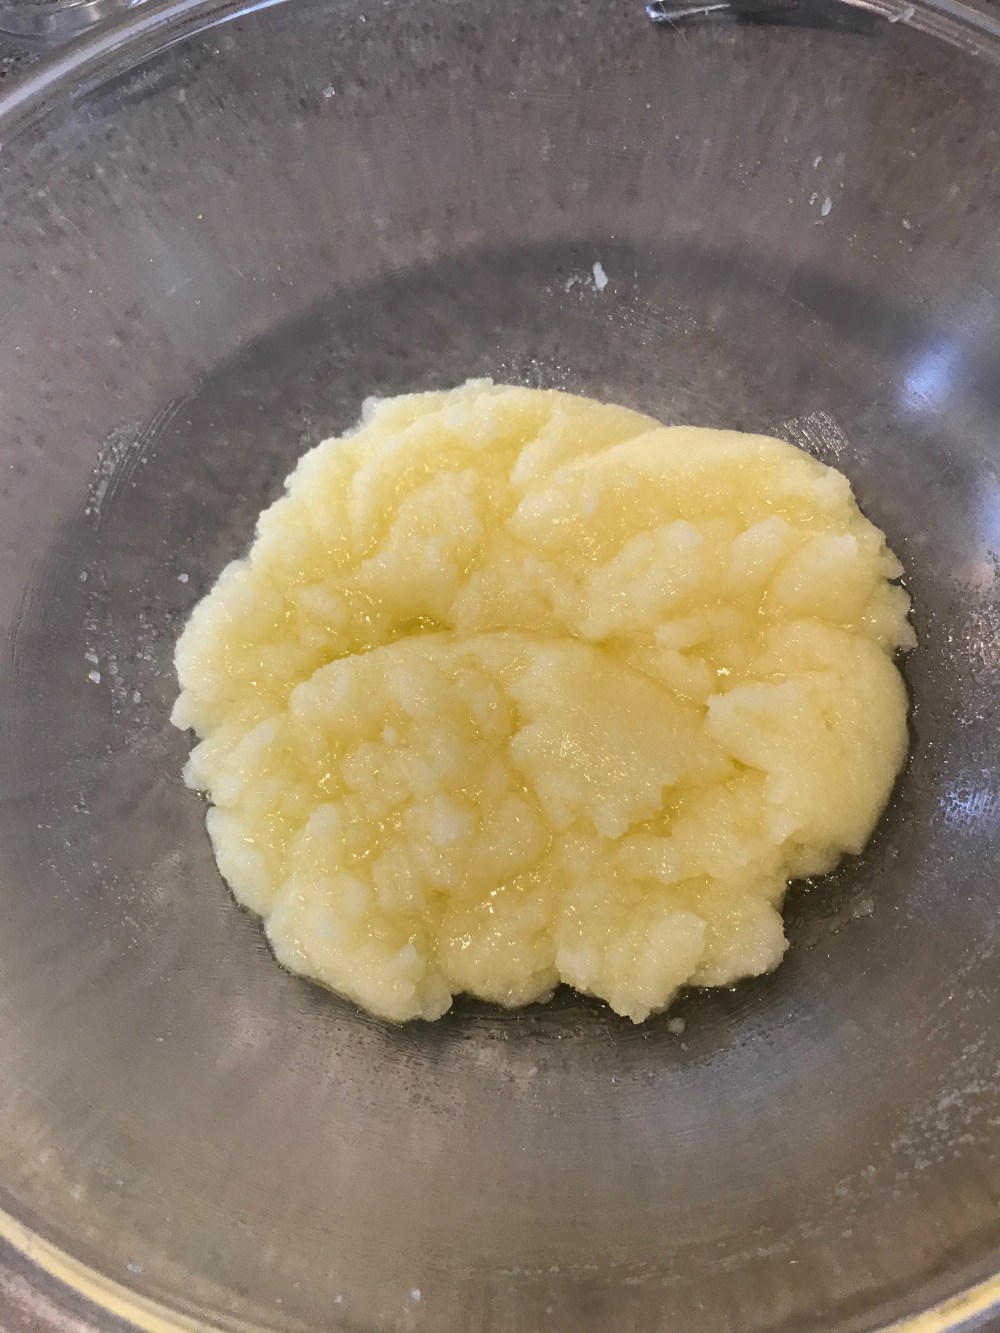
In a large mixing bowl combine the sugar, melted butter, salt and vanilla (if using). Mix until everything is evenly mixed and has the consistency of wet sand. Like the picture below.
 Now it’s time to add in the eggs one at a time, mixing until each egg is fully incorporated before adding the next one. I found it easier to use a spatula, because the sugar and butter got caught in the tines of the whisk too easily. Once all the eggs have been added, the batter will lighter, and smoother.


When it looks like this, its time to add the flour and cocoa powder. Mix until smooth and no lumps are present.This looks delicious already but I’m going to take it one step further and add in the chopped peanut butter cups. You can stop here and bake the brownies, if you want that’s up to you.
Gently fold the peanut butter cups into the batter with a spatula until every piece is mixed in.

Looks even more delicious doesn’t it? Now to put the batter in the pan and bake up these delicious little brownies! I used a small cookie scoop to divide my batter into all 24 little squares on my pan but you can use a spoon if that’s easier. Fill the squares 1/2 full with batter if using a bite size mold. Bake for 15-25 minutes depending on your oven and pan size, mine took 17 minutes to bake. I also had some extra batter after filling my bite size pan, so I greased an 8×8 pan and poured the rest of my batter into it. I also had 4 peanut butter cups that I didn’t use in the brownie bites so I laid them in the pan. I baked the other pan for 25 minutes.

Let the brownie bites cool completely in their pan, then carefully remove them and place on a cooling rack until you’re ready to decorate.
Speaking of which, let’s get to the decorations.
For the decorations, you will need:
- Grey fondant
- A sharp paring knife
- Metallic cake paint in silver or pewter
- Bloody skull and bones sprinkles
- Spider, bat, and ghost sprinkles
- Royal icing ghosts – the ones that I used are holding candy corn
- Royal icing bloody zombie hands
- Crushed up Oreo cookies – to look like dirt
- Melted chocolate – to help the Oreo “dirt” stick to the tops of the brownies
- A small icing spatula to spread the melted chocolate
- Parchment paper to lay the tombstones on for drying

You can pick up the premade decorations at a craft store in the baking aisle or seasonal aisle. Just remember to check for coupons!
Start by kneading the fondant until it’s soft and pliable. Lightly cover your work surface with cornstarch so your fondant doesn’t stick, then roll out the fondant to an even thickness.

Now it’s time to cut out the tombstones, this is the only part of this one that I free-handed since I knew how I wanted them to look. Not all of them are the same size or shape but that’s ok, it just adds to the creepy effect. Once all the tombstones are cut out and laid out on parchment paper, its time to add a little creepiness, so I took a small decorator brush (but you can use a clean paintbrush it’ll work just as well) along with some of the cake paint in metallic silver, and brush a thin layer over the tombstones to make them look weathered and old.
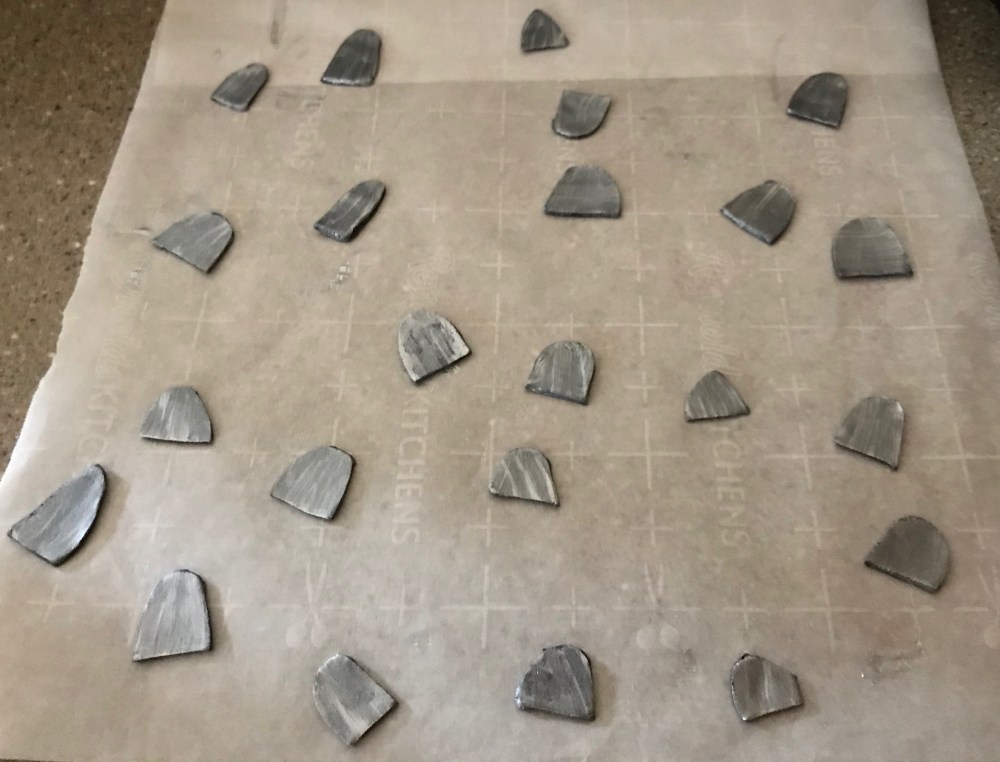 I made these a couple of days in advance so that they would dry a little bit and hold up better when it was time to place them on the brownie bites.
Next, it’s time to make the “dirt” for this graveyard. I just used a mini chopper and threw in 6-8 Oreos at a time and just ground them up to a nice powder. You can also place them into a ziplock bag, seal it up and beat them with a rolling-pin until you’re left with a bag full of Oreo powder. Pour the “dirt” into a bowl and set it aside for now.
Then, in a microwave safe bowl, place 1/4 cup chocolate chips and microwave them in 30 second intervals stirring in between until all of the chocolate is melted. Let the chocolate come to room temperature while you get the rest of the decorations together.
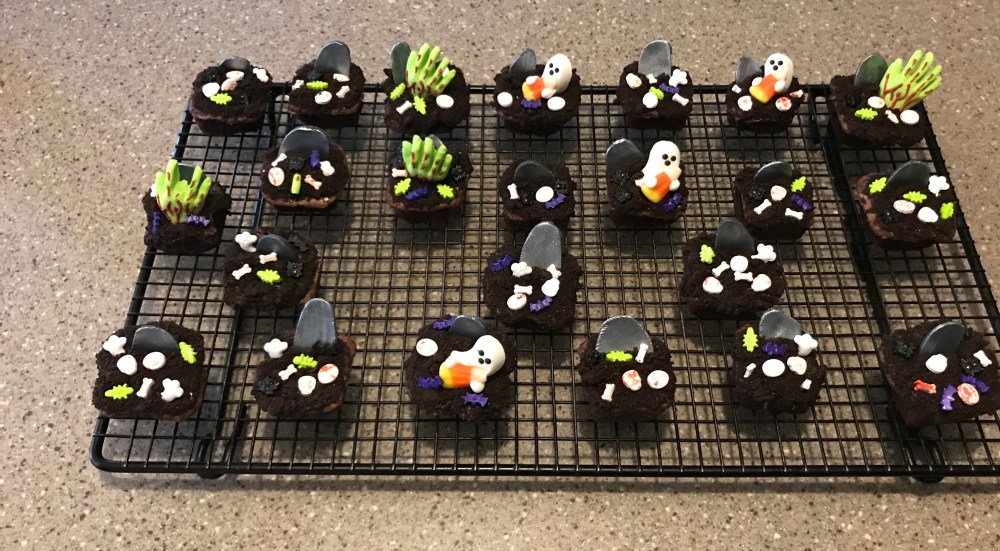
Now it’s time to make this graveyard come to life! Start by adding a small amount of the melted chocolate to the top of each brownie bite and smoothing it out with an icing spatula or a table knife. Cover the chocolate with the Oreo crumbs, now it’s time for the fun part (in my opinion), the decorations!
Put a tombstone in the top of brownie, then go wild, using ghosts, skull and bone sprinkles, zombie hands, and spider and bat sprinkles. Just scatter the sprinkles over the “dirt” and place the zombie hands in the middle so that they look like they’re coming up out of the grave. I placed the ghosts off to the side and then scattered spiders and bats around them to make it look eerie and haunted.
I also made full-sized brownie graveyards for a party. One with tombstones made out of candy melts and covered in bloody skulls and bones. The other one had bloody zombie hands and neon sour gummy worms on it.


Cool looking right?
These were a lot of fun to make, stay tuned the third and final Halloween baking post!
Until next time,
Peace, Love, and Sugar,
Brooke

